


[ODOO 19] To do this, you can use an automation rule that updates the Reference field by assigning it the next value in a sequence.
- Firstly, enable debug mode. (This can be found at the bottom of the Settings application. Alternatively, you can press Control + K, clear the forward slash if there is one ("/"), then type 'debug.'
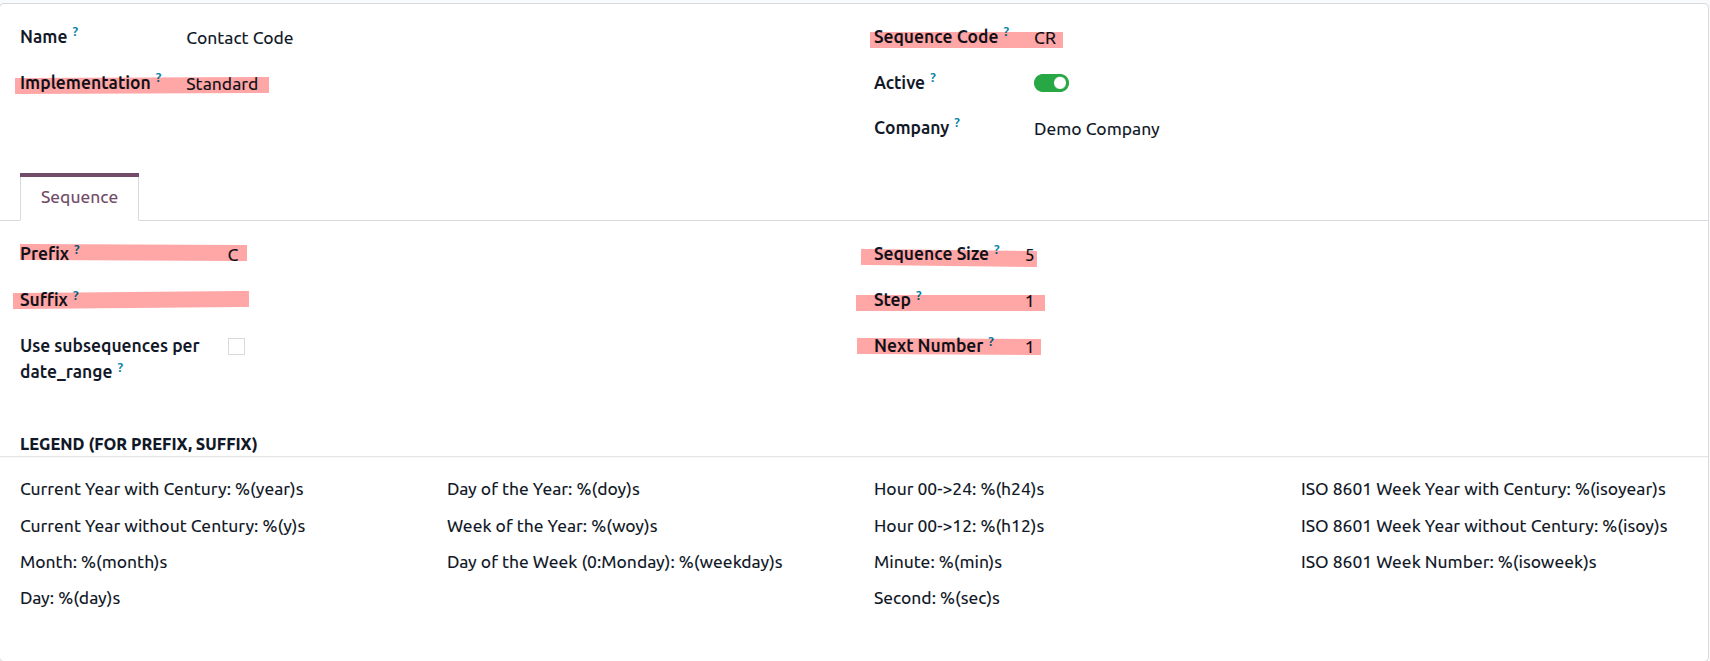
- Go to the 'Sequences' technical menu and create your desired sequence.
- Implementation: No Gap fills in unassigned numbers that once belonged to deleted records. If the current sequence is 001, 002, 004: No Gap will assign 003, standard will assign 005.
- The Sequence Code is predominantly there as a way to reference the sequence in automation rules that use code. Since we're not using code, this should be a simple acronym or one-word reference.
- The Prefix goes before the sequence number, the Suffix goes after.
- The Size predetermines the amount of digits in every code. If this setting is left at '0', the amount of digits will always correspond to the next number - if your next number is 10, you'll get REFERENCE10. If the size is set to 4, it will be REFERENCE0010.
- The Step determines what is added to the sequence number each time it is generated. At the default of 1, we would have REFERENCE001, REFERENCE002, and REFERENCE003. At a step of 2, we would have REFERENCE001, REFERENCE003, and REFERENCE005.
- The Next Number allows you to start from a later point in that number's sequence. let's say you are transitioning a sequence from another system, and it is at number 1700. You can set 'Next Number' to 2000 to properly differentiate all new sequences added to the system (or the exact number afterward, though the switchover would need to be quite exact).
3. Once you've created your sequence, go to a menu with your desired model (Contacts, Products, etc) and open Studio. Then, click on Automations and create a new one.
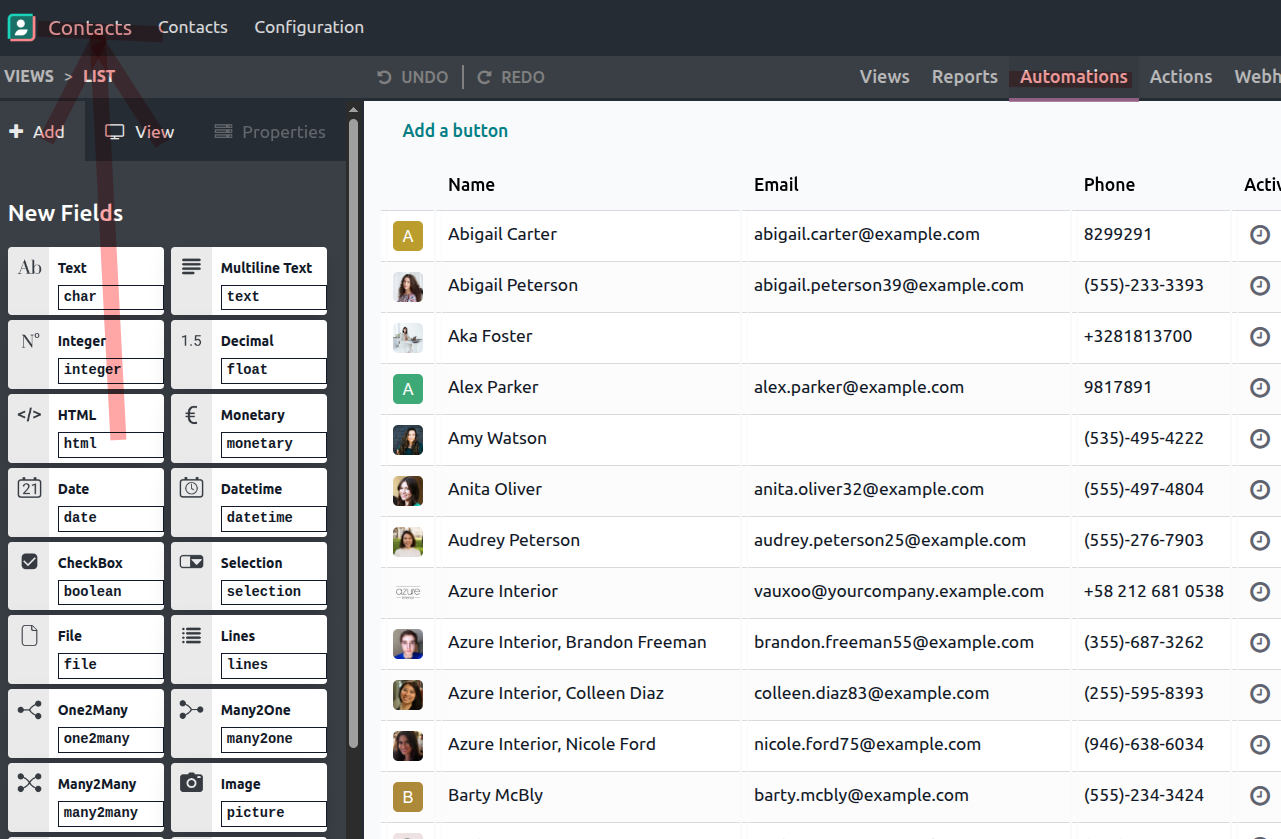
Once on the new automation form, you'll want to set up the rules.
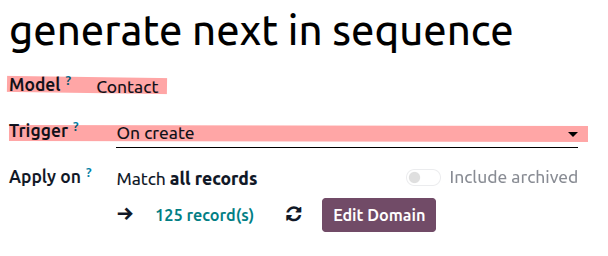
Ensure the model is correct, and that the trigger is set to 'on create.' You can also use the Apply On field to make it so this automation only affects specific contacts, like those you deem customers (as a generic example).
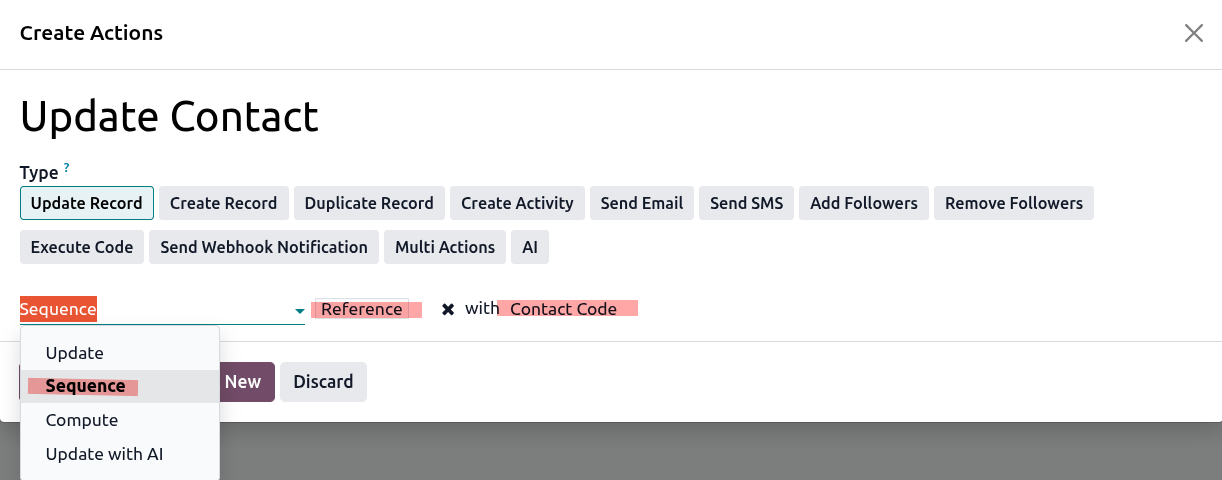
Then, click Add an Action. Choose to Update Record, switch the option to 'Update' to 'Sequence', choose the desired text field from the model, then finally the sequence you created.
Save this automation rule, and you're ready to go: Odoo will now generate and assign the next value in your sequence to the reference field for every new contact in the system.